Gluten-Free Pie Crust
Flaky, Buttery Homemade Pie Crust Without Gluten
A good pie always starts with a great crust. For people who follow a gluten-free diet, finding a pie crust that is flaky, tender, and easy to handle can sometimes feel challenging. Traditional pie crusts rely on wheat flour to provide structure, but with the right combination of gluten-free ingredients, you can create a crust that is just as delicious.
This homemade gluten-free pie crust is buttery, crisp, and perfectly flaky. It works beautifully for both sweet and savory pies, making it a versatile recipe you’ll want to keep in your baking collection. Whether you’re preparing apple pie, pumpkin pie, quiche, or fruit tarts, this crust delivers excellent flavor and texture.
The secret to success is using a balanced gluten-free flour blend combined with cold butter and proper chilling time. These elements help create the light, flaky layers that make pie crust so satisfying.
Best of all, this recipe is simple to prepare and requires only a few pantry ingredients.
Why Make Gluten-Free Pie Crust at Home?
Many store-bought gluten-free pie crusts are available, but homemade crust offers several advantages.
Better Flavor
Fresh homemade crust tastes richer and more buttery.
Improved Texture
You can control the ingredients and technique to create a flaky texture.
Customizable
Add herbs for savory pies or sugar and vanilla for sweet desserts.
Budget Friendly
Gluten-free baking products can be expensive, so making crust at home can save money.
What Makes a Good Gluten-Free Pie Crust?
Because gluten-free flour lacks the elasticity of wheat flour, successful gluten-free crusts depend on a few key elements.
Balanced Flour Blend
Using a blend of rice flour, potato starch, and tapioca starch provides structure and tenderness.
Xanthan Gum
This ingredient helps bind the dough and prevents crumbling.
Cold Butter
Cold butter creates pockets of fat that produce flaky layers.
Proper Hydration
Adding ice water slowly helps the dough come together without becoming sticky.
Key Ingredients
Each ingredient in this recipe plays an important role in achieving the perfect pie crust.
Gluten-Free All-Purpose Flour
A high-quality gluten-free flour blend provides the main structure.
Butter
Cold butter gives the crust its rich flavor and flaky layers.
Salt
Enhances the overall flavor.
Sugar (Optional)
Used for sweet pies to add a hint of sweetness.
Xanthan Gum
Improves elasticity and helps hold the crust together.
Ice Water
Helps bring the dough together without melting the butter.
Tips for the Best Gluten-Free Pie Crust
Keep Ingredients Cold
Cold butter prevents the fat from melting too early, which helps create flaky layers.
Do Not Overwork the Dough
Overmixing can make the crust tough.
Chill the Dough
Refrigerating the dough allows the flour to hydrate and improves texture.
Roll Between Parchment Paper
Gluten-free dough can be delicate, so rolling between parchment sheets prevents sticking.
Preparation Time
- Prep Time: 15 minutes
- Chill Time: 30 minutes
- Bake Time (if blind baking): 15–18 minutes
- Total Time: 45 minutes
Ingredients
- 1½ cups gluten-free all-purpose flour blend
- ½ teaspoon xanthan gum (if not included in flour blend)
- ½ teaspoon salt
- 1 tablespoon sugar (optional for sweet pies)
- ½ cup unsalted butter, very cold and cubed
- 4–6 tablespoons ice water
Optional additions:
- ½ teaspoon lemon juice (helps tenderize the crust)
- ½ teaspoon apple cider vinegar for improved texture
Instructions
Step 1: Mix the Dry Ingredients
In a medium bowl, whisk together the gluten-free flour, xanthan gum, salt, and sugar.
Step 2: Add the Butter
Add the cold cubed butter to the flour mixture.
Using a pastry cutter or your fingertips, cut the butter into the flour until the mixture resembles coarse crumbs.
Small pieces of butter should remain visible.
Step 3: Add Ice Water
Gradually add ice water, one tablespoon at a time, mixing gently until the dough begins to come together.
The dough should be slightly crumbly but able to hold together when pressed.
Step 4: Form the Dough
Gather the dough into a ball and flatten it into a disk.
Wrap it in plastic wrap and refrigerate for 30 minutes.
Step 5: Roll Out the Dough
Place the chilled dough between two sheets of parchment paper.
Roll the dough into a circle about ⅛ inch thick.
Carefully transfer it to a pie dish.
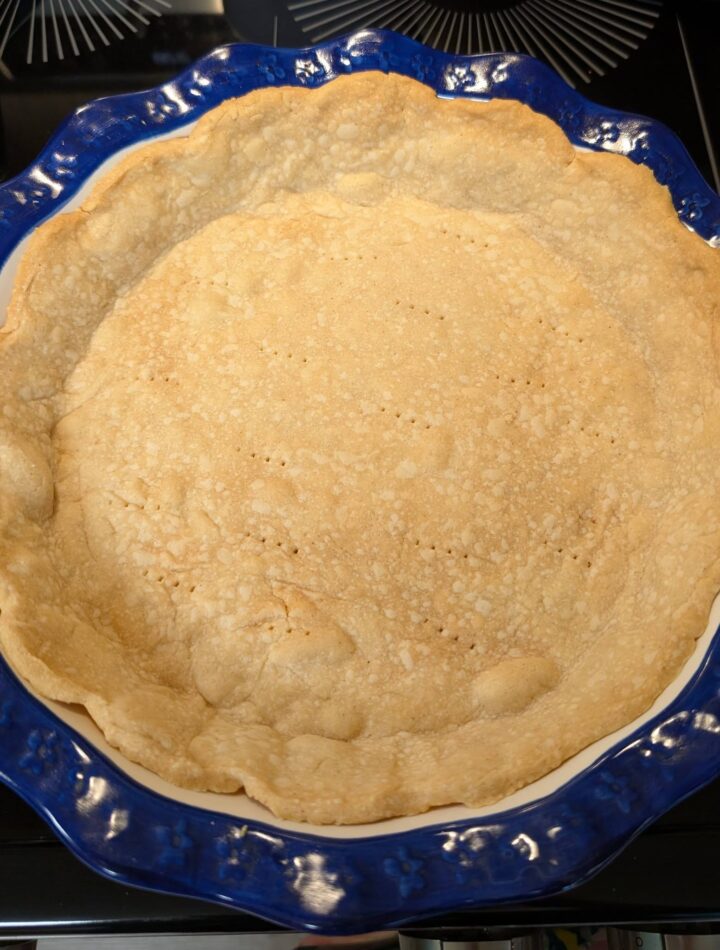
Step 6: Shape the Crust
Press the dough gently into the pie pan and trim the edges.
Crimp the edges with your fingers or a fork.
Step 7: Blind Bake (Optional)
If your recipe requires a pre-baked crust:
- Preheat oven to 375°F (190°C)
- Prick the crust with a fork
- Line with parchment and add pie weights or beans
- Bake for 15–18 minutes
Remove the weights and bake an additional 5 minutes if a crisp crust is desired.
Best Pies to Use This Crust For
This gluten-free crust works well for many desserts and savory dishes.
Fruit Pies
Apple pie, blueberry pie, peach pie
Custard Pies
Pumpkin pie, lemon pie, chocolate pie
Savory Pies
Quiche, chicken pot pie, vegetable pies
Storage Tips
Refrigerator
Wrap the dough and store for up to 3 days before baking.
Freezer
Freeze dough for up to 2 months.
Baked Crust Storage
A baked crust can be stored at room temperature for 2 days.
Nutritional Information (Per Slice – Approximate)
- Calories: 180
- Carbohydrates: 20 g
- Protein: 2 g
- Fat: 10 g
- Saturated Fat: 6 g
- Fiber: 1 g
- Sodium: 120 mg
Why This Gluten-Free Pie Crust Recipe Works
This recipe combines cold butter, a balanced gluten-free flour blend, and proper chilling time to create a crust that is tender, flaky, and flavorful. The addition of xanthan gum provides structure while ice water helps bring the dough together without melting the butter.