Crispy Gluten-Free Fried Chicken Legs
Golden, Crunchy Southern-Style Chicken Without Wheat Flour
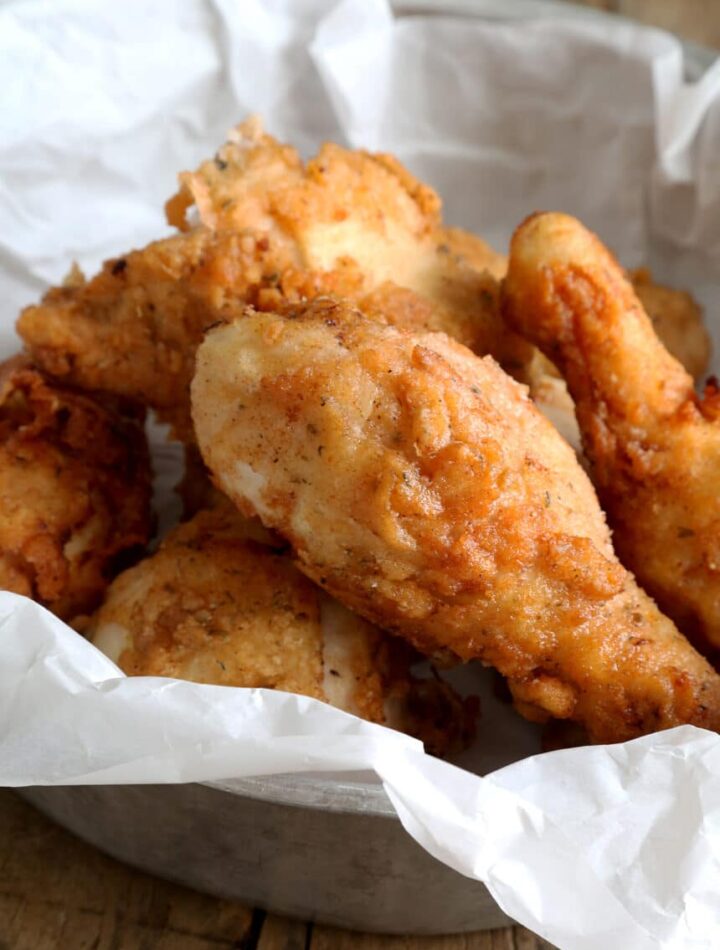
Few comfort foods are as satisfying as crispy fried chicken. The crackly golden coating, juicy meat inside, and savory seasoning make it one of the most loved dishes around the world. But for people following a gluten-free diet, traditional fried chicken made with wheat flour isn’t always an option. The good news is that you can make incredibly crispy gluten-free fried chicken legs at home using simple ingredients that deliver the same crunchy texture and delicious flavor.
This recipe creates perfectly seasoned gluten-free fried chicken drumsticks that are crunchy on the outside and tender on the inside. Instead of regular flour, a combination of gluten-free flour and starch creates a light coating that fries beautifully. The result is chicken that tastes just as good as classic Southern fried chicken but without gluten.
Chicken legs are ideal for frying because they stay juicy and flavorful during cooking. The dark meat remains tender while the coating becomes crispy and golden brown. Whether you’re preparing dinner for your family, serving guests, or making a weekend comfort meal, these homemade gluten-free fried chicken legs are guaranteed to impress.
Why You’ll Love This Gluten-Free Fried Chicken
There are many reasons this recipe has become a favorite among gluten-free cooks.
Perfectly Crispy Coating
The gluten-free flour mixture creates a crunchy crust similar to traditional fried chicken.
Juicy and Tender Chicken
Chicken legs remain moist during frying and absorb the flavorful seasoning.
Easy to Make
This recipe uses simple pantry ingredients and straightforward cooking steps.
Great for Family Meals
Everyone loves fried chicken, making this recipe perfect for gatherings and dinners.
Naturally Gluten-Free
Using gluten-free flour allows people with gluten intolerance or celiac disease to enjoy fried chicken safely.
Choosing the Best Chicken Legs
For the best results, start with fresh, high-quality chicken drumsticks.
Look for:
- evenly sized chicken legs for consistent cooking
- skin-on drumsticks for crispiness
- fresh or properly thawed chicken
Pat the chicken dry before seasoning. Removing excess moisture helps the coating stick and creates a crispier crust.
The Secret to Crispy Gluten-Free Coating
Traditional fried chicken relies on wheat flour to create a crunchy crust. In gluten-free cooking, a combination of flours and starches works just as well.
Common gluten-free coating ingredients include:
- gluten-free all-purpose flour
- cornstarch or potato starch
- rice flour
Starch helps produce an extra crispy texture when fried. Combining it with gluten-free flour creates a light, crunchy coating that browns beautifully in hot oil.
Seasoning for Maximum Flavor
Fried chicken should always be well seasoned. The seasoning blend adds depth and enhances the natural flavor of the chicken.
A classic seasoning mixture often includes:
- garlic powder
- onion powder
- paprika
- salt
- black pepper
You can also add cayenne pepper or chili powder for a little heat.
Seasoning both the chicken and the flour coating ensures flavor in every bite.
The Importance of Marinating
Marinating chicken before frying helps tenderize the meat and infuse flavor.
One of the best marinades for fried chicken is buttermilk. Buttermilk slightly tenderizes the meat and helps the coating stick.
If you don’t have buttermilk, you can make a simple substitute by adding a little lemon juice or vinegar to milk and letting it sit for a few minutes.
Marinating the chicken for at least 30 minutes improves both flavor and texture.
Step-by-Step Guide to Making Gluten-Free Fried Chicken Legs
Step 1: Prepare the Chicken
Wash and pat dry the chicken legs with paper towels.
Season lightly with salt and pepper.
Place them in a bowl with buttermilk and allow them to marinate for at least 30 minutes. For deeper flavor, marinate for up to 4 hours in the refrigerator.
Step 2: Prepare the Gluten-Free Coating
In a large bowl combine:
- gluten-free flour
- cornstarch or potato starch
- garlic powder
- onion powder
- paprika
- salt
- black pepper
Mix well to evenly distribute the seasoning.
Step 3: Coat the Chicken
Remove the chicken from the buttermilk marinade.
Allow excess liquid to drip off.
Dredge each chicken leg in the gluten-free flour mixture, pressing gently so the coating sticks to the surface.
For extra crunch, dip the chicken back into the buttermilk and coat again with flour mixture.
Step 4: Heat the Oil
Heat oil in a deep skillet or heavy pot to 350°F (175°C).
Maintaining the correct temperature is important. Oil that is too cool will make the chicken greasy, while oil that is too hot can burn the coating before the chicken cooks through.
Step 5: Fry the Chicken
Carefully place the coated chicken legs into the hot oil.
Fry in batches to avoid overcrowding the pan.
Cook for about 12–15 minutes, turning occasionally, until the coating is golden brown and the internal temperature of the chicken reaches 165°F (74°C).
Step 6: Drain and Rest
Remove the fried chicken legs and place them on a wire rack or paper towels.
Let them rest for a few minutes to allow excess oil to drain and the coating to crisp up.
Tips for Perfect Gluten-Free Fried Chicken
Use a Thermometer
A cooking thermometer ensures the oil stays around 350°F (175°C) for best frying results.
Don’t Overcrowd the Pan
Cooking too many pieces at once lowers the oil temperature and prevents crispiness.
Double Coat for Extra Crunch
A second layer of coating creates a thicker, crispier crust.
Let the Chicken Rest
Allowing the chicken to rest after frying keeps the coating crisp.
Flavor Variations
You can easily customize this recipe with different flavors.
Spicy Fried Chicken
Add cayenne pepper or hot sauce to the marinade.
Garlic Herb Chicken
Add dried herbs such as thyme, oregano, or parsley to the coating.
Southern Style
Add smoked paprika and a pinch of mustard powder.
Extra Crispy Version
Mix crushed gluten-free cornflakes into the flour coating.
What to Serve with Gluten-Free Fried Chicken
Fried chicken pairs well with many classic side dishes.
Popular options include:
- mashed potatoes
- coleslaw
- corn on the cob
- roasted vegetables
- potato salad
- gluten-free biscuits
You can also serve it with dipping sauces like honey mustard, barbecue sauce, or ranch dressing.
Storage and Reheating
Refrigerator
Store leftover chicken in an airtight container for 3–4 days.
Reheating
For the best texture, reheat in the oven at 375°F (190°C) for about 10–15 minutes until crispy.
Freezing
Fried chicken can be frozen for up to 2 months. Reheat in the oven to restore crispiness.
Nutrition Information (Approximate per serving)
Calories: 320
Protein: 28 g
Carbohydrates: 16 g
Fat: 18 g
Fiber: 1 g
Sodium: 420 mg
Values vary depending on ingredients and frying oil.